As a content writer, blogger, or business owner, you must consistently update your website and social platforms with high-quality, fresh content. However, maintaining a consistent flow of articles can be extra difficult without a clear strategy and a streamlined workflow.
Fortunately, there are strategies for keeping your team and/or yourself organized. This is where creating an editorial workflow comes into play, allowing you to create content that engages your audience and helps your site rank well in search engine results.
In this article, we will discuss the importance of creating content in a manageable and scalable manner using the editorial workflow process. We’ll also give you some pointers on how to use it to your advantage as well as which tools might be useful. Let’s get started!
What Is A WordPress Editorial Workflow
The procedures you use to publish a piece of content, such as an article or blog post, are known as the editorial workflow. Your workflow is made up of all the activities that take place during the process, from ideation to promotion, including conversations, writing, researching, and other activities. An editorial workflow is what truly implements your content marketing plan and gives your editorial calendar life.
In order to plan your ideal workflow, you must first meet with your team and agree on the overall process. Producing content requires a lot of work and action, from start to finish. You’ll want to make a list of everything that needs to be done. This should go beyond content creation itself to include steps like preparation, research, and promotion too.
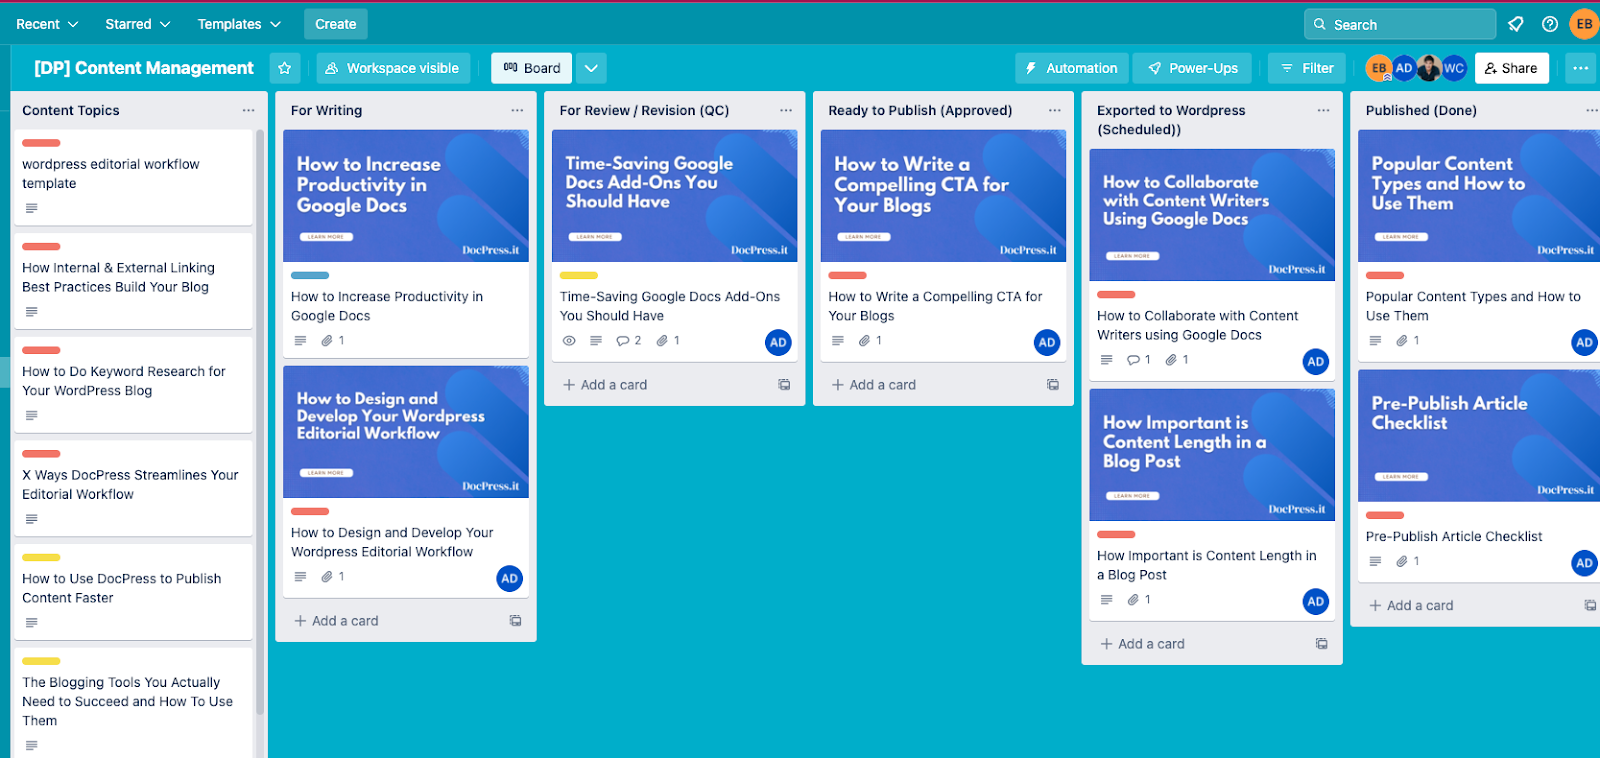
If it helps you wrangle a complicated process, group the tasks into larger workflow phases, such as the following:
- Phase 1: content strategy – This includes the content calendar planning, SEO keyword research, and selecting a CTA
- Phase 2: content creation – This phase includes doing the content guide outline, writing, and even the graphic design
- Phase 3: content promotion – This phase includes the optimization, publishing, and distribution
Why Designing a Great Editorial Workflow is Essential?
An editorial workflow process establishes a distinct chain of command. Having this will allow writers to be aware of the appropriate reporting channels and contact persons. Also, editors and marketers will be aware of when to send a project to design or seek legal approval. All in all, delegation is made simpler through editorial workflows. Your team members will always know what work they’re responsible for, and when they need to complete it.
On the other side of the coin, your team’s workflow is likely undefined, unclear, and unhelpful if you’ve never given it much thought or attention. The process is likely to differ from article to article, and steps may be missed or completed incorrectly. That disorganization and lack of clarity costs your team time, energy, and results.
Steps In Creating an Editorial Workflow Process
Step 1: Perform Keyword Research
The first step in your editorial workflow process must be to conduct keyword research. Doing this will assist you in determining which keywords to target and provide valuable insight into the queries that your target audience is searching for on Google.
The insights you can gain from these actual search terms can help inform both your content strategy and your overall marketing strategy. By getting your content in front of our audience as they conduct searches, you stand to gain more traffic. Therefore, you should be targeting those searches.

Moreover, learning how to conduct effective SEO keyword research and analysis is one of the most valuable skills you can acquire when you want to use content marketing to grow your business. With keyword research, you can discover the specific terms people use to solve their problems, as well as the context around them. It informs your content optimizations every step of the way.
As a first step, you will need to use a keyword research tool to generate more keyword ideas based on exact match keywords and phrase match keywords. Some of the most popular ones include:
Bonus tip: You can start by focusing on broad keywords and then narrow them down. Remember that you can always return to and modify your list of target keywords as your business grows and you begin to flesh out your content calendar.
Step 2: Pick a Topic
Once you’ve narrowed down a few keywords, the next step in the editorial process is to choose a topic for your post. This entails generating ideas for topics centered on your target keywords.
This is the part where you need to consider what questions your current audience is asking and which topics are most relevant to your business and goals when deciding what to write about. For starters, you can start with broad concepts and then narrow them down as you go.
Coming up with new blogging ideas can sometimes be more difficult than writing the articles themselves. If you’re struggling with writer’s block, you could conduct a competitive analysis to see what your competitors are writing. You just have to determine unique angles, interesting perspectives, and gaps in the content coverage to guide your strategy.
If you want to learn more about the different types of content other than blog posts and know how you can use them to your advantage, check out our in-depth article on the subject: 7 Popular Content Types and How to Use Them
Step 3: Create a Content Guide Outline
A Content Guide Outline is a summary and outline of the to-be-written content. It contains all of the information required by a writer to create the content. It could include the following details:
- The target audience
- Word Count
- Tone of voice to use
- Keywords to use
- Specific messaging needed
- Other SEO details
- Suggested outline of headings and subheadings
The essence of having a content guide outline is to have an organized plan in place. This allows you or the writers to write more efficiently and accurately. This is especially important for those who are creating a large amount of interconnected content. You can see which pieces of content complement each other and identify opportunities for linking if you have an outline for each piece. As a result, outlining multiple pieces of content at once is an important part of any content strategy.
Step 4: Assign a Writer
After you and your team have decided what you’re going to write about, the next logical step is to decide who will write the piece. You can also identify any key players, such as editors and proofreaders, who will be involved. Of course, if you’re a one-man show, this step isn’t required.
However, if you work on a team with multiple writers and contributors, it’s critical that all relevant parties understand the editorial flow and their specific roles.
Check out our previous article to learn the best ways to collaborate with your team and other content writers: How to Collaborate with Content Writers using Google Docs
Step 5: Write the First Draft
Once you’ve decided what to write about and who will be in charge of the article, you can start working on it. The amount of time required will vary depending on your specific business, experience level, content quality, and so on.
For instance, if you want your blog to be lighthearted and informal, you won’t have to devote as much time to statistics and research. It’s also a good idea to have a timeframe for how long the writing process will take during this stage of the workflow.
Step 6: Edit, Refine, and Review the Draft
Once the first draft is completed, you or someone in charge of quality control can start the editing and reviewing process. It’s important to note that the length and thoroughness of this step will vary depending on your specific goals and the number of team members involved.
The editing and review stage is an important part of the editorial flow process because it aids in quality control. It can keep you from publishing posts that are riddled with errors and omissions, which can discredit you and make you appear unprofessional.
Moreover, it’s usually a good idea to have at least two sets of eyes on a post before submitting it for publication. This can assist you in identifying and correcting inaccuracies, as well as improving the overall flow.
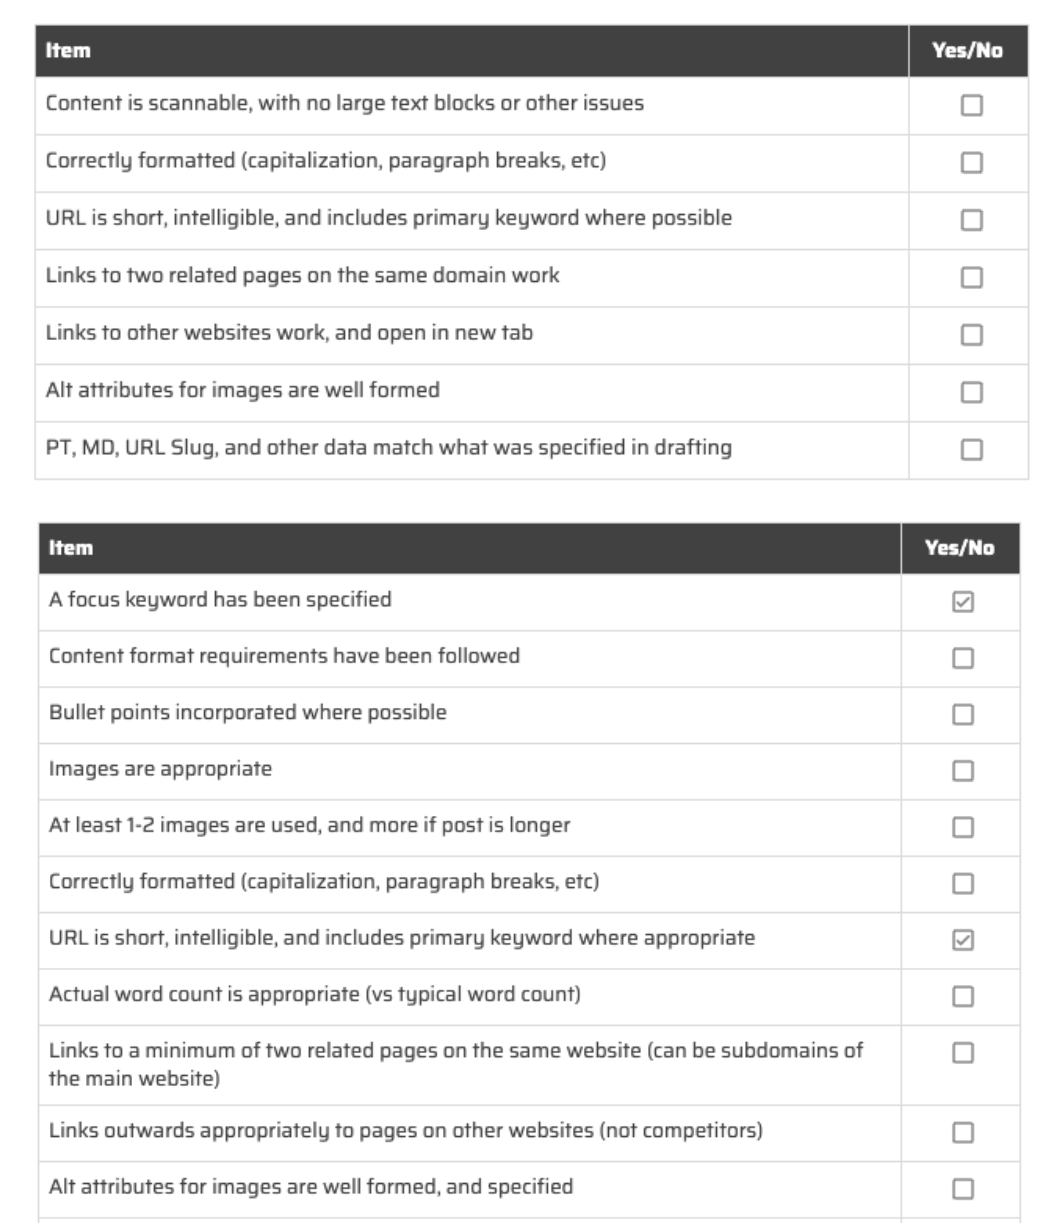
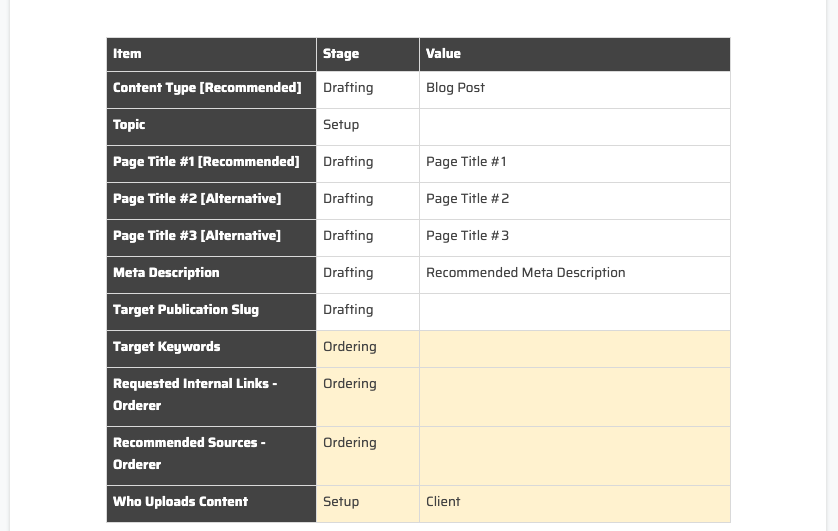
You can improve your quality control by creating a checklist that catches errors and missing parts. See image below for some good examples of what to include in a quality control checklist.
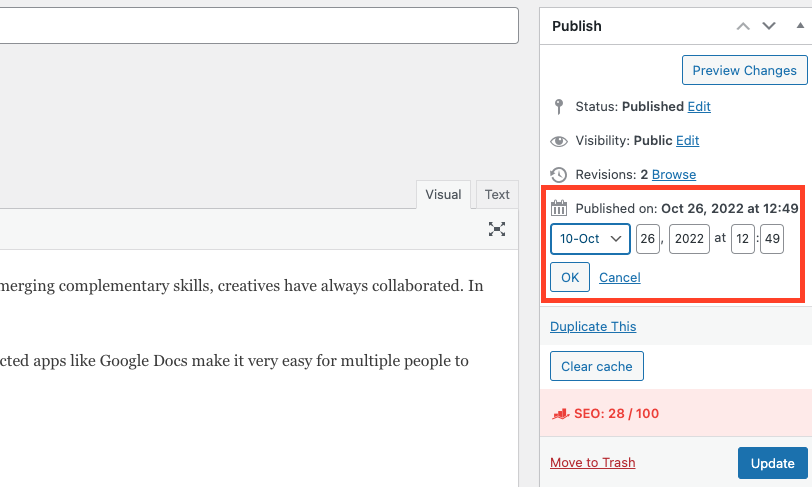
The editorial flow process concludes with the content being finalized and published. If you’re following a content calendar and writing articles ahead of time, you can publish or schedule posts using WordPress’ built-in feature:
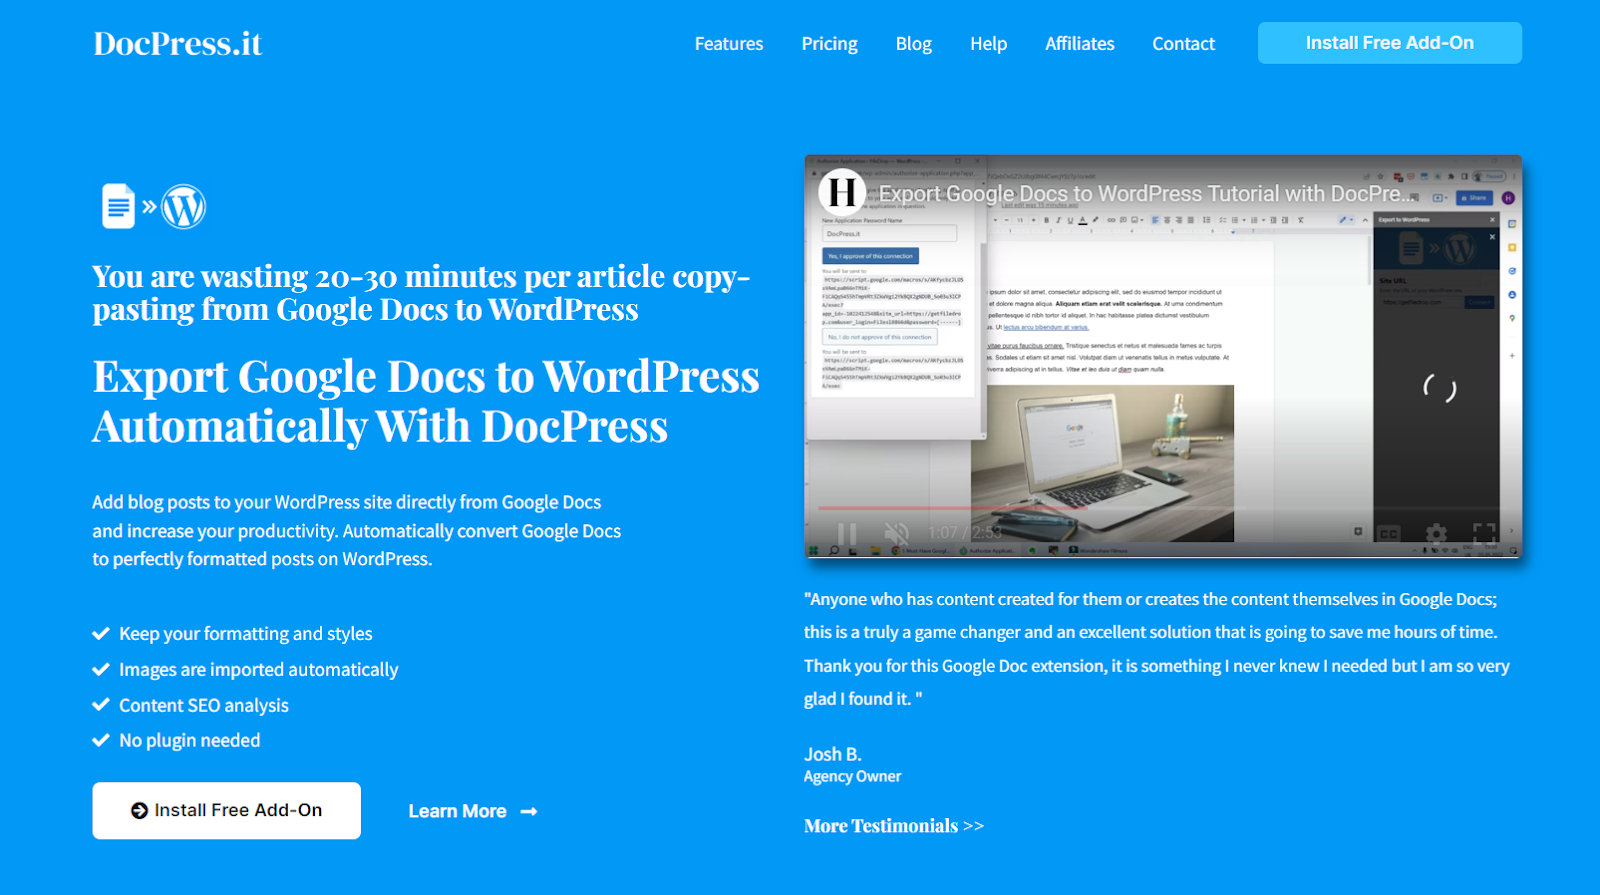
More importantly, there are also various third-party plugins and tools you can use to export and publish posts. Our very own DocPress add-on is fantastic for bloggers, writers, marketers, publishers, affiliates, and other teams looking to save 20 to 30 minutes per article by publishing their work directly from Google Docs right into WordPress.
If you’re manually copying and pasting your work from Docs to WordPress for 10 articles a month, that means having DocPress could save you up to 5 hours of valuable work.Documents made in Google Docs retain their formatting, styles, and images without installing any plugins on your WordPress site. Everything happens in the background, safely and securely.
Tips To Improve Your WordPress Editorial Workflow
Knowing the steps and tools mentioned above will help you be prepared to start working with your own editorial workflow. In the interest of further helping you streamline your editorial workflow process, here are some additional helpful hints to keep in mind as you go through the procedure.
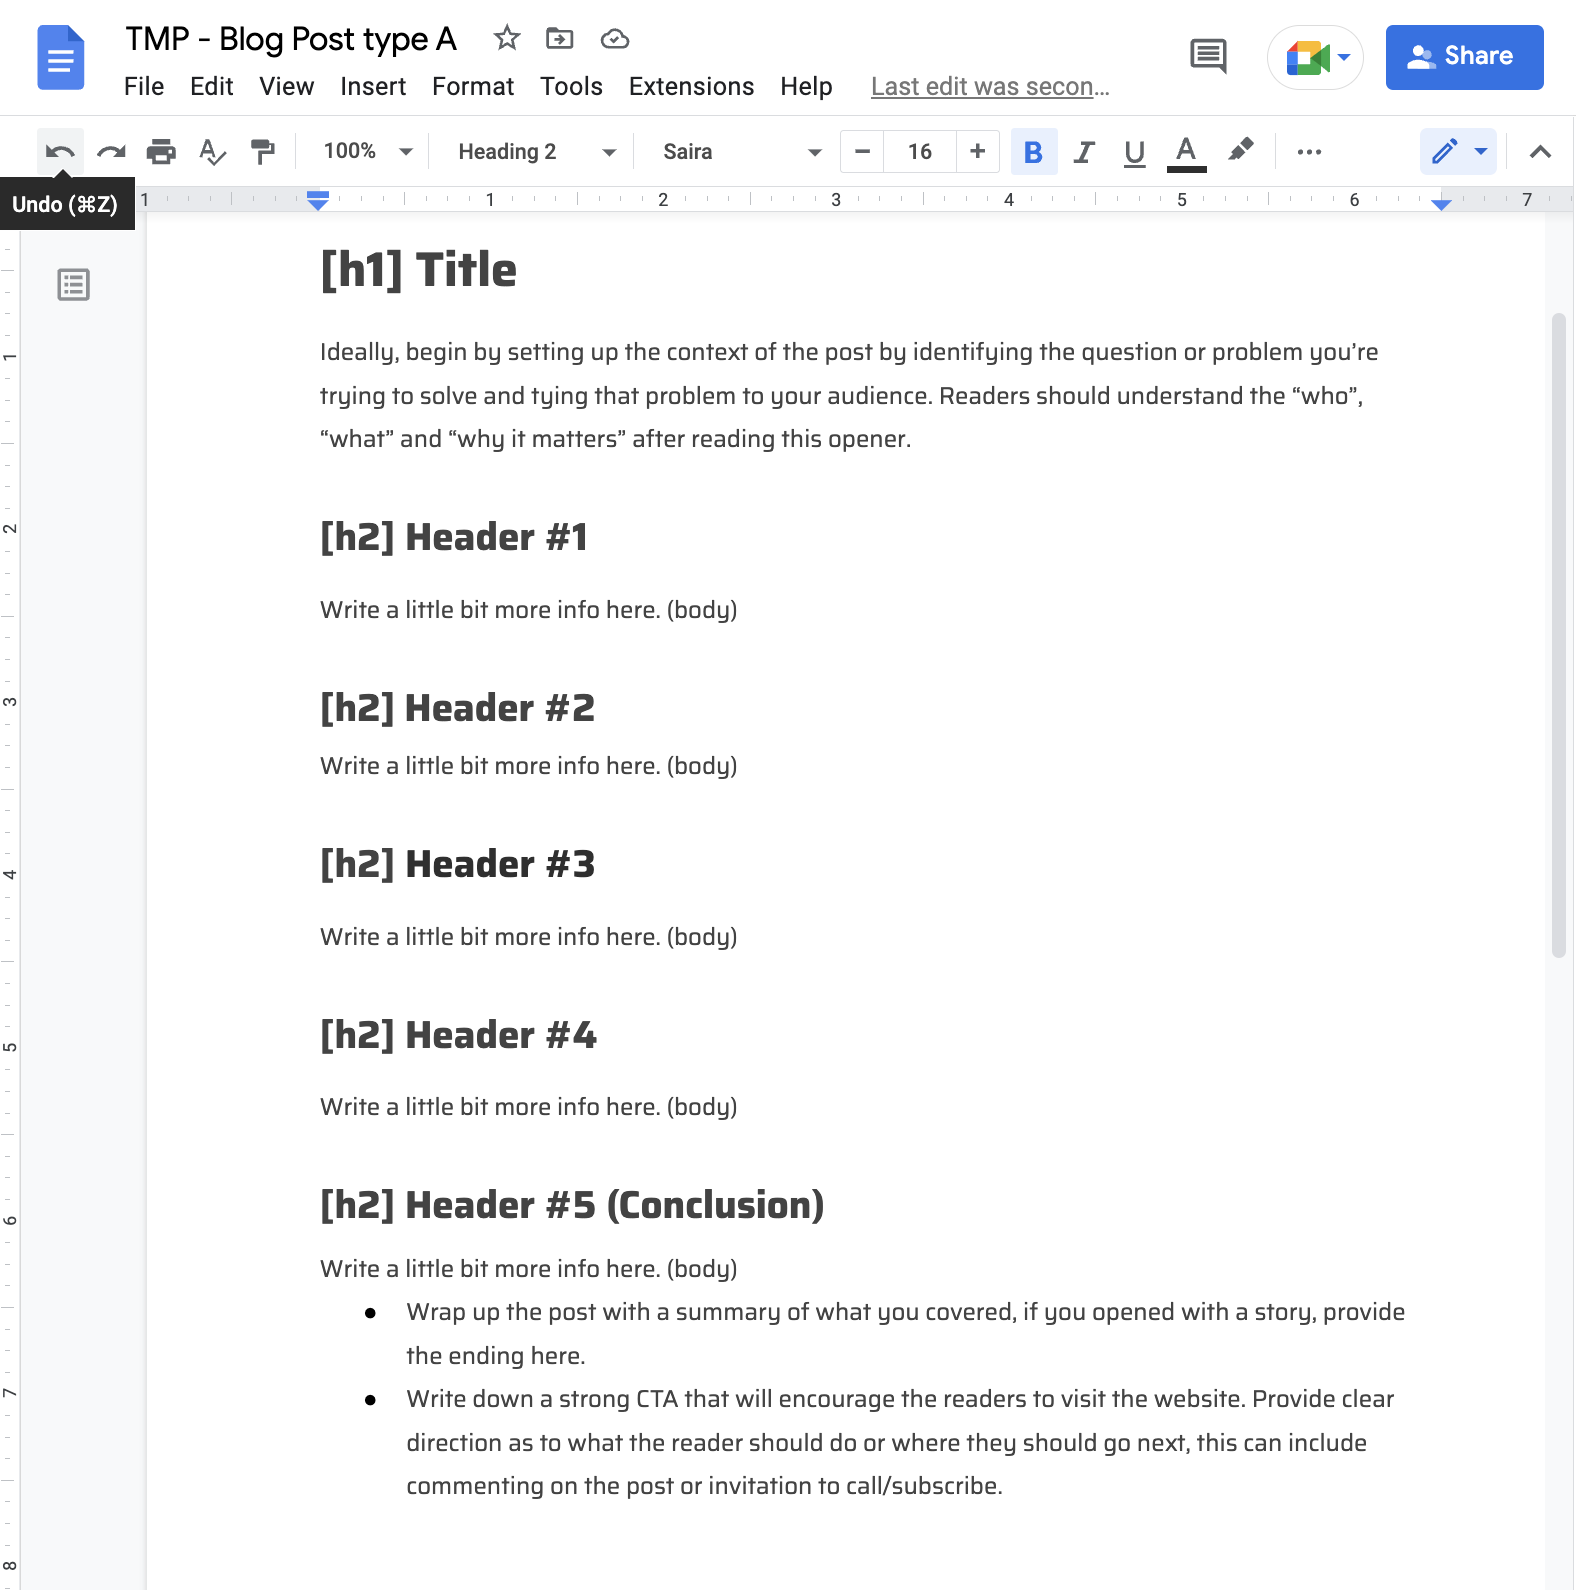
1. Use Templates When Creating Content Outlines
The key to streamlining your editorial process is to spot and eliminate duplicate and repeated operations. Making and utilizing templates for your content outlines is one approach to achieve this.
You can save time by using a template for your content outlines rather than creating one from scratch for every post. Additionally, it will make sure you don’t forget important components and details.
2. Maintain an Objective-Focused Content
Making sure that every piece of content you produce has a purpose is crucial. More particular, you should make sure that your blog postings serve one of your corporate objectives.
You might want to think about including a topical field in your content brief to help. Target a certain customer profile and Call To Action for each piece of content. This can ensure that throughout the writing process, your articles remain sharply focused on a purpose.
3. Automate Processes Whenever You Can
Higher productivity, dependability, availability, improved performance, and lower operating costs are all advantages of automated processes. Making the switch to lights-out operations pays off well. The advantages of automated systems might be a strong incentive to improve service to your end users.
Additionally, you can automate a variety of processes using a program like DocPress:
With DocPress, you can enhance productivity by directly adding blog entries to your WordPress site from Google Docs. Automate the conversion of Google Docs into WordPress posts that are precisely formatted.
Improve Your WordPress Editorial Workflow with DocPress Today!
It becomes obvious what you can do to streamline the workflow and increase production efficiency by taking a fresh look at how things are being done and performing a workflow evaluation. Blogging can be made much simpler by taking the effort to establish a robust editorial workflow.
DocPress is a Google Docs add-on with a free forever plan that helps you get started with your editorial workflow. You can also upgrade to any of our paid plans that match your blogging frequency. Subscribing also gives you access to our SEO Analysis and Readability score tools to help you rank higher and reach more people.
Install the add-on for free here or learn more by visiting DocPress.it.

Subscribe to our newsletter below to get amazing new articles, promos but also tips and tricks.